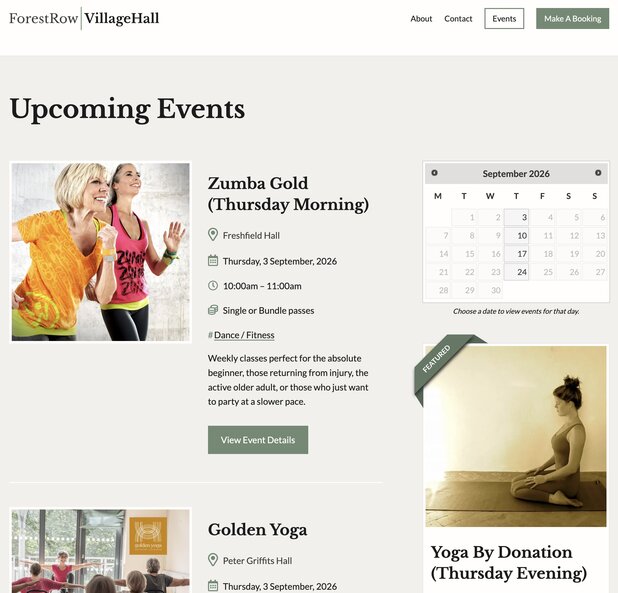
This process turns an approved hall booking into an accurate public event listing. A Booking Form alone is not permission to advertise an event.
Access required
- WordPress Editor access to the Forest Row Village Hall website.
- Access to Gravity Forms entries, including Public Event Details.
- Read access to the Freshfield Hall, Peter Griffits Hall and RBL Committee Room calendars.
- Access to the site-admin mailbox when a Public Event Details notification must be checked.
The approval sequence
- The hirer submits the Booking Form from the hall website.
- The hall manager checks availability, insurance, alcohol licensing and other requirements.
- The hall manager sends the price, payment instructions and booking conditions.
- When appropriate, the hall manager sends the hirer the Public Event Details link.
- The hirer submits the public title, description, excerpt, categories, contact details and featured image.
- The site administrator verifies hall-manager confirmation/payment status and matches the Public Event Details submission to the calendar.
- Only then is the event published.
Important: use the correct form
The Booking Form is the hall-hire request. Do not use it as the source for public promotional copy. The correct source is Public Event Details, which also allows the hirer to supply a featured image.
Calendar and confirmation checks
- Show only the three hall calendars.
- Open every more overflow control on busy days.
- Read notes such as No Class, Cancelled, PROV, Start back, Last Class, venue changes and time changes.
- If the calendar says PROV, or confirmation is unclear, contact the hall manager and do not advertise the event.
- If the hall manager confirms the booking but no Public Event Details submission exists, ask the hirer to complete that form before publishing.
Create and verify the listing
- Create the first event using the Public Event Details title, excerpt, full description, categories, image and contact information.
- Use the public event time, not setup or clearing time included in the hall booking.
- For a recurring series, duplicate the first approved listing for each confirmed calendar occurrence.
- Apply every exception and keep only one suitable occurrence featured.
- Return to All Events and verify the dates, venue, privacy status and featured column. Spot-check the editor fields.
Keeping this article current
This is a living working-practice article. Update it whenever the form, approval process, calendar conventions or WordPress event fields change.